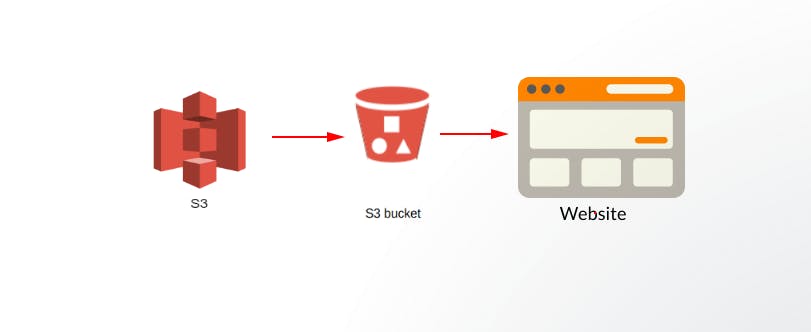
Choosing different platforms to host and deploy your project can be very frustrating. This tutorial will show you how to host a Todo List website using Amazon Web Service (AWS) Command Line Interface (CLI). AWS is one of the top cloud providers in the world, and they have numerous services available to tech enthusiasts of different stacks. I can't wait to get started; let's dive in
What is Amazon Simple Storage Service (S3)
Amazon Simple Storage Service, also known as Amazon S3, is an object storage service that offers industry-leading scalability, data availability, security, and performance. AWS S3 enables users to store and retrieve any volume of data at any time or location, providing developers with access to highly scalable, dependable, quick, and affordable data storage. There are reasons why I think Amazon S3 is a very durable and fascinating storage service. These are:
S3 has data durability of 99.999999999 percent (11 9s). This means that if you kept 10,000,000 objects in Amazon S3, you would lose just one object once every 10,000 years. That is awesome!
Every object uploaded to S3 will be automatically duplicated and stored on numerous systems. This ensures that comprehensive data is available when you need it while safeguarding your data from mistakes, failures, and attacks.
You are allowed to store an endless amount of data and objects. The size of a single Amazon S3 object can vary from 0 bytes to 5 TB in size. In simple terms, the maximum size of a single file upload on Amazon S3 is 5TB. This is one of the best features I love about Amazon S3.
You can read more about Amazon Simple Storage Service (S3) here.
A Basic Introduction to AWS Command Line Interface (AWS CLI)
Generally, there are two methods of administering and managing AWS services. These methods are:
- AWS Management Console
- AWS CLI
In this tutorial, I will focus on AWS CLI to create the static website on S3.
AWS Command Line Interface (CLI) is a unified tool for configuring and managing AWS services. AWS CLI makes it easy to automate processes and install the software in minutes.
How to install AWS CLI on Various Operating Systems
AWS CLI can be installed on Windows, Mac Os, and Linux distributions.
Install AWS CLI on Windows
The installation requirements for the installation of AWS CLI on windows include:
AWS CLI is only supported on Microsoft-supported versions of 64-bit Windows.
You must have admin rights to install AWS CLI on Windows
Once these requirements have been satisfied, you can install AWS CLI on windows.
You can install AWS CLI on your local PC using the steps below:
The first step is to download and run the AWS CLI MSI installer for Windows (64-bit) using this link: awscli.amazonaws.com/AWSCLIV2.msi.
The next step is to verify that AWS CLI has been installed on your local computer.
aws --version
Install AWS CLI on Mac OS
The installation requirements for the installation of AWS CLI on Mac OS include:
- AWS CLI is only supported on Apple-supported versions of 64-bit Mac OS.
Once these requirements have been satisfied, you can install AWS CLI on your Mac OS.
You can install AWS CLI on Mac OS through two methods:
- GNI Installer
- Mac OS Terminal
I will walk you through how to install via GNI Installer. You can check this resource on how to install on Mac OS Terminal.
To install AWS CLI on MAC OS via GNI installer, follow the steps below:
The first step is to download the macOS pkg file using this link: awscli.amazonaws.com/AWSCLIV2.pkg
Next step is to run the downloaded file and follow these instructions on your screen. You can choose to install the AWS CLI using GNI Installer in the following ways:
1.Install AWS CLI For all users (requires sudo)
To install for all users, you can install to any folder or choose the recommended default folder, which is /usr/local/aws-cli.
After this, the installer will automatically create a symlink using recommended folder in /usr/local/aws-cli and then link it to the main program in the installation folder you chose.
2.Install AWS CLI for the current user (it doesn't require sudo)
To install for the current user, you can install to any folder to which you have write permission. You can read more about file and folder permissions here.
Please follow the commands to install AWS CLI to a folder to which the current user has permission to use GNI installation.
sudo ln -s /folder/installed/aws-cli/aws /usr/local/bin/aws
sudo ln -s /folder/installed/aws-cli/aws_completer /usr/local/bin/aws_completer
Finally, you can verify if AWS CLI has been correctly installed by running the commands below.
which aws
aws --version
Install AWS CLI on Linux
The installation requirements for the installation of AWS CLI on Linux include:
You must be able to extract or "unzip" the downloaded package. Use an equivalent if your operating system doesn't have the built-in unzip command.
AWS CLI uses glibc, groff, and less. These are included by default in most major distributions of Linux.
AWS CLI is only supported on a 64-bit version of Linux distributions such as CentOS, Fedora, Ubuntu, Amazon Linux 1, Amazon Linux 2, and Linux ARM.
To install on major Linux distributions, follow the steps below:
- The first step is downloading the installation file using the following command.
curl "https://awscli.amazonaws.com/awscli-exe-linux-x86_64.zip" -o "awscliv2.zip"
- The next step is to use a file extractor tool like unzip to extract the contents of the downloaded file. I am using unzip, and this is the command to extract the file.
unzip awscliv2.zip
- Now that you have extracted the file contents, you will need to install the contents. To install the contents, you will need administrative access to your computer. The following command will ensure you install the file by obtaining root access.
sudo ./aws/install -i /usr/local/aws-cli -b /usr/local/bin
- Finally, you can verify that AWS CLI has been installed on your Linux computer with the following command.
aws --version
Configure AWS CLI
To configure AWS CLI in your OS terminal, you must ensure that an Identity and Access Management (IAM) user is created on the AWS Console Management. Here is an excellent resource to create and set up an IAM user on AWS. I will use Linux OS to configure and create the Todo List static website.
Once you have created an IAM User using AWS Console Management, enter the following commands to add the user on your local computer terminal.
aws configure
On Prompt, you will be required to provide the user Access Key, Secret Access Key, default region name, and default output format.
- Access Key: You can create an Access Key for the IAM user using AWS Console Management
- Secret Access Key: The secret access key will be generated once the access key has been created.
- Default region name: This is the default region where resources (S3, instances, EFS, etc.) will be placed. In my case, I will choose us-east-1 as my default region
- Default Output format: You should input JSON as your default output format as it is the standard output format recommended by AWS.

Create Amazon Simple Storage Services (S3) Bucket
To create an S3 bucket for the static website, you will need to enter the following commands in the terminal.
aws s3 mb s3://todo-list-s3
The command above creates an s3 bucket named todo-list-s3. Please note that the name of the s3 bucket must be unique across all regions on AWS.
Create S3 Bucket Policy
A bucket policy is a resource-based AWS Identity and Access Management (IAM) policy. It is used to grant other AWS accounts, or IAM users access permissions for the bucket and the objects in it.
To ensure that the files and content in the S3 bucket are visible to anyone, you must create a put-bucket policy.
- The first step is to create a bucket policy JSON file on your local computer. In this case, I will create a folder named tmp and place the JSON file in it.
mkdir tmp
touch /tmp/bucket_policy.json
- The next step is to edit the JSON file and create the policy using vim.
vi /tmp/bucket_policy.json
{
    "Version": "2012-10-17",
    "Statement": [
        {
            "Sid": "PublicReadGetObject",
            "Effect": "Allow",
            "Principal": "*",
            "Action": "s3:GetObject",
            "Resource": "arn:aws:s3:::todo-list-s3/*"
        }
    ]
}
- The last step in creating the policy to allow Public read is to attach the JSON file to the S3 bucket using this command.
aws s3api put-bucket-policy --bucket todo-list-s3 --policy file:///tmp/bucket_policy.json
Upload Todo List website Files to S3 Bucket
Now that you have created the S3 Bucket, you will need to upload the files of the Todo List website on it.
First of all, you will have to get the website content from this Github repository: github.com/HammedBabatunde/S3-static-website-
You can clone the contents of the repository by using git commands.
git clone git@github.com:HammedBabatunde/S3-static-website-.git
Once the repository has been cloned to your local computer, you can easily upload the Todo List website files to the S3 bucket with the command below.
aws s3 cp todo-list-project s3://todo-list-s3 --recursive
Enable S3 Bucket Static Website
The files for the Todo List website have been uploaded to the S3 bucket. The next step is to enable the todo-list S3 bucket as a static website, which can be done using the below command.
aws s3 website s3://todo-list-s3/ --index-document index.html
This command enables the creation of a static website using the content of the S3 bucket, and it also specifies the index.html file in the S3 bucket as the index document.
Using the command below, you can also specify the error document, such as the 404 page.
aws s3 website s3://todo-list-s3/ --index-document index.html --error-document error.html
Great Job! It is time to access the static website you created, but what is the URL? Once you have created a static website using the S3 bucket, you can access the website using this URL format.
<bucket-name>.s3-website.<AWS-region>.amazonaws.com
Bucket-name: This is the name of the S3 bucket in which the static website was created. In the case of the Todo List website, it is todo-list-s3.
AWS-Region: This is the region in which the S3 bucket will be created.
Finally, you can access the Todo List website you created using the link below.
todo-list-s3.s3-website-us-east-1.amazonaws..
Conclusion
In this tutorial, you were able to create an S3 bucket static todo-list webpage using AWS Command Line Interface (CLI). With AWS CLI, you can easily create and manage AWS services efficiently.
I'd love to connect with you at Twitter | LinkedIn | GitHub
